All Activity
- Past hour
-

Take a Ride on the Hatch Express With SuperHatch: Tuesday Tips With Frank
The AutoCAD Blog posted a topic in AutoCAD Blogs
By my count, AutoCAD comes with 82 hatch patterns. A list that large will surely contain everything you need, right? Of course not. That’s where SuperHatch can come to the rescue. SuperHatch is an AutoLISP command, and can be found in the Draw panel of the Express Tools tab of the ribbon. It seems like it’s been there forever, but it has a copyright date of 1999 in the .LSP file, so we’ll go with that. SuperHatch allows you to use an image, block, Xref, or wipeout as a hatch pattern. Or, if one of those objects already exists in your drawing, you can simply select it. Let’s look at a couple of ways to use this Express Tool to your advantage. Apply Material Images Let’s say you have a 2D detail that’s just lines and polylines. The boss comes to you and tells you they need to use it for the marketing team, and tells you to “add a little pop with some realistic looking materials”? Oh, and they need it for a meeting in half an hour. Now what? You scroll through the gallery of hatches, and of course, nothing there comes close. You need a hatch pattern for wood, concrete, and dirt. There’s probably something in the Materials collection over in the 3D world, but that’s not a good option either. Then you remember that blog post you read about SuperHatch. Remember? You can apply images as hatches. Being a resourceful internet search engine user, you quickly find some great images and download them (or screengrab and save as an image). Now you at least have your images and you have about 20 minutes left. No problem. Let’s look at that workflow. I’ve inserted my three images in the image below using the Xref palette. A word of warning… if you did use a screencap method to grab your image, and are thinking of just popping it in, make sure you use “Paste Special” and add it as an “Image Entity”. Otherwise, you’ll get an OLE object and SuperHatch won’t know what to do with it. Since I’ve already added the images, I’ll call up SuperHatch and use the “Select existing <” button. I’ll select the wood grain image, then with the default option of “Internal Point”, I’ll click inside one of the upright rectangles, and then the other. Now that my internal picking is done, I’ll press Enter, and the wood grain hatch is created! Do the same workflow for the other two necessary images, filling in the footings and the surrounding dirt, and you’ve just made the boss happy with 15 minutes to spare. Go ahead and give yourself a pat on the back while you’re getting a well-deserved cup of coffee. Create Your Own Hatch-looking Hatch The file that contains the hatch pattern definitions is named acad.pat. If you find it and open it, you’ll see that it’s a simple text file containing a bunch of cryptic definitions. Scroll to the bottom to see a section designated for user-defined patterns. I bet yours is empty too. Nobody in their right mind is going to try their hand at creating a complicated hatch pattern. Check out the image below. These are the definitions for Hexagon and Honeycomb. Both are somewhat complicated, but not terrible. Unless you try to code it. But, you need what you need, and that’s a complex custom hatch pattern – or at least something that looks like a hatch pattern. SuperHatch to the rescue again. Check out the animation below. I’ve created a drawing that I want to use as a “tile” in my hatch design. This time, it’s sitting out in a folder, so I choose the “Block” option in the SuperHatch dialog, (yes, fellow Lispers – it’s a DCL file), navigate to my drawing, pop an instance of it into blank space, accept the insert defaults, and another return to end its selection. Now it works like our first example, where I select an interior point and again press return. And, just like that, I’ve created a hatch-looking hatch! Pretty slick, I’d say. One more thing… You can select the new faux hatch, but like I said, it’s not a real hatch object. It’s an unnamed Group. If you turn off Group Selection, you can select the individual blocks that make up the group. That control is found in the Home tab of the ribbon, within the Groups panel. A Final Thought Are there some nuances to using SuperHatch? Yes. You can’t adjust anything after you’re done. In my previous example, the block used was the same size as the one I chose. If I wanted it bigger, I would have had to scale it during insertion. With the materials images, size also matters. If you put them into the drawing like I did, you might want to make them big; otherwise, they too will want to tile and mess up your fake materials. But, if the situation calls for it, or even if it’s the boss, SuperHatch really can become your superhero. (Cape and mask not included.) More Tuesday Tips Check out our whole Tuesday Tips series for ideas on how to make AutoCAD work for you. The post Take a Ride on the Hatch Express With SuperHatch: Tuesday Tips With Frank appeared first on AutoCAD Blog. View the full article - Today
-

Attributes be added to factor the outcome of Incremental numbers
u4ea2u2 replied to u4ea2u2's topic in AutoLISP, Visual LISP & DCL
I see what your saying "Apple" is first before "DDE" to be given "001" due to alphabetical order. Maybe you are using Attribute Part_Number "Apple" as the 1st sort order. Can we keep the original code's order where 1st sort level comes from the Sort_Order attribute value? That way "Apples" part_name is not sorted 1st. The addition of 2 other sort levels would be "cherry on the cake", but not as necessary as the quest that when the code assigns incremental numbers order ( not by x or y or sequence blocked placement) to block's Port_Number attribute value it stutters and places the same assigned # again when multiple blocks have matching Sort_Order #s and matching Part_Number #s. So 2 "Apples" both get assigned "003" twice based on they both have the same sort order value AND the same Part_Number value. The stuttering numbers looks like a challenge. You have a Good point...if an extra "DDE" were at the bottom with a different Sort_Order #s it wouldn't work. Need warning when Part_Numbers #s and Sort_Order #s don't match. Sorting order is listed below. Sort_Order | Sort_Order2| Sort_Order3 | Part_Number = Port_Number 1000 | 001 | "" | DDS = 001 1100 | 003 | "" | Pie = 002 1100 | 003 | "" | Pie = 002 1200 | 1 | "" |Apple = 003 1200 | 001 | Tomorrow |Peach= 004 1200 | 001 | Tomorrow |Peach= 004 1200 | 001 | Tomorrow | Pear = 005 1200 | 001 | Yesterday |Cherry=006 1250 | "" | "" | Box = 007 1250 | "" | "" | Box = 007 etc Hopefully I explained it better this time. If it's possible for a Sort_Order2 that would be awesome, third Sort_Order3 would be COOL! Thanks for asking for clarification. -

Best Practices for Millwork in Retail Construction Projects
oddssatisfy replied to oddssatisfy's topic in AutoCAD Beginners' Area
thanks in advance for any help -
Best Practices for Millwork in Retail Construction Projects
oddssatisfy posted a topic in AutoCAD Beginners' Area
Hey everyone, I’m currently working on a retail construction project and trying to figure out the most effective ways to integrate millwork elements. From display fixtures to checkout counters, it seems like every detail makes a huge difference in the overall customer experience. I want to better understand millwork and how it impacts durability, branding, and functionality in a retail space. Are there particular materials, finishes, or design approaches you’d recommend for high-traffic environments? Also, how do you balance cost with quality when choosing millwork solutions? Any insights or real-world examples would be greatly appreciated! -

Attributes be added to factor the outcome of Incremental numbers
BIGAL replied to u4ea2u2's topic in AutoLISP, Visual LISP & DCL
If you look at the list above you will see that "Apple" comes in as the 1st entry when sorted. So that would be given the number 001, not "DDE". You can do a simple sort on the Y & X then they will be numbered top down. But what happens if you put an extra "DDE" at the bottom ? So please confirm how you want them to be numbered. If its by Y then easy. Have a look at the PEACH PEACH & CHERRY the CHERRY is slightly lower so using Y would work. - Yesterday
-

Function to calculate Mtext Justification based on Rotation
GLAVCVS replied to CivilTechSource's topic in AutoLISP, Visual LISP & DCL
I think you've solved the problem very well. In response to your request for improvements or suggestions, I've provided some minor modifications below that, in my opinion, make the command more intuitive. (defun c:LE-CalExtFFL ( / pt1 pt2 pt3 r TxtRotation TxtJustification radians degrees ecoA) (setq ecoA (getvar "CMDECHO")) (setvar "CMDECHO" 0) (vla-startUndomark (vla-get-activeDocument (vlax-get-acad-object))) (command "_layer" "_m" "-LE-E-External Levels" "") (setq Prefix "") (setq Suffix "") (setq ffl-ent (car (entsel))) (if (and ffl-ent (= (cdr (assoc 0 (entget ffl-ent))) "MTEXT")) (setq r (vl-catch-all-apply '(lambda () ;; Get the MText object and extract text content (setq ffl-obj (entget ffl-ent)) (setq ffl-text (cdr (assoc 1 ffl-obj))) (princ (strcat "\nFFL Text found: " ffl-text)) (setq ffl-value (ExtractFFLValue ffl-text)) (princ "\nSelect points where to place the level text (Press Enter to finish): ") (if ffl-value (if (setq pt1 (getpoint "\nSelect first point: ")) (if (setq pt2 (getpoint pt1 "\nSelect second point: ")) (virtualiza) ) ) ) ) ) ) ) (if r (entdel (entlast))) (setvar "CMDECHO" ecoA) (princ) ) (defun virtualiza (/ para grd mto) (princ "\nMove the mouse to decide justification (escape to CANCEL)...") (while (and (not para) (setq grd (grread nil 13 0)) (listp (cadr grd))) (setq pt3 (cadr grd)) (setq SpotLevel (- ffl-value 0.15)) ;; Initialize point list ;; Prompt for points where to place the new MText (setq TxtRotation (angle pt1 pt2)) (setq TxtValue SpotLevel) (DefMTextJustification pt1 pt2 pt3) (if mto (entmod (subst (cons 71 TxtJustification) (assoc 71 (entget mto)) (entget mto))) (setq mto (CreateMText pt1 TxtValue TxtRotation TxtJustification)) ) (if (= (car grd) 3) (setq para T)) ) (vla-EndUndomark (vla-get-activeDocument (vlax-get-acad-object))) ) (defun ExtractFFLValue (text-string / clean-text) (if (> (strlen text-string) 5) ;Charcters Removed from String (setq clean-text (substr text-string 6)) (setq clean-text text-string) ) (if (numberp (read clean-text)) (read clean-text) (progn (princ "\nError: Could not extract numeric value from FFL text.") nil ) ) ) (defun DefMTextJustification ( p1 p2 p3 / ) ;; Top Left = 1 ;; Top Center = 2 ;; Top Right = 3 ;; Middle Left = 4 ;; Middle Center = 5 ;; Middle Right = 6 ;; Bottom Left = 7 ;; Bottom Center = 8 ;; Bottom Right = 9 (if (or (and (>= (angle p1 p2) 0.0) (<= (angle p1 p2) (/ PI 2.))) (>= (angle p1 p2) (/ (* 3. PI) 2.))) (progn (setq TxtJustification 1) (setq Prefix "+") (setq Suffix "") (if (> (angle p1 p3) (angle p1 p2)) (progn (setq TxtJustification 7) (setq Prefix "+") (setq Suffix "") (if (and (= (angle p1 p2) 0.0) (> (angle p1 p3) 4.71238898)) (progn (setq TxtJustification 1) (setq Prefix "+") (setq Suffix "") ) ) ) ) ) (progn (setq TxtJustification 3) (setq Prefix "") (setq Suffix "+") (setq TxtRotation (+ TxtRotation pi)) ;;Set Justification to Bottom (if (> (angle p1 p3) (angle p1 p2)) (progn (setq TxtJustification 3) (setq Prefix "") (setq Suffix "+") ) (progn (setq TxtJustification 9) (setq Prefix "") (setq Suffix "+") ) ) ) ) ) (defun CreateMText ( point txtvalue txtrot txtjust / txtjust txtrot mtext-obj) (setq mtext-obj (entmakex (list (cons 0 "MTEXT") (cons 100 "AcDbEntity") (cons 8 (getvar "CLAYER")) ; Current layer (cons 100 "AcDbMText") (cons 10 point) ; Insertion point (cons 40 0.5) ; Text height (adjust as needed) (cons 41 0.0) ; Reference rectangle width (cons 71 txtjust) (cons 72 5) ; Drawing direction (cons 1 (strcat Prefix (rtos txtvalue 2 3) Suffix)) ; Text content with "+" prefix (cons 50 txtrot) ; Rotation angle ) ) ) mtext-obj ) -

Attributes be added to factor the outcome of Incremental numbers
SLW210 replied to u4ea2u2's topic in AutoLISP, Visual LISP & DCL
Just post a link to the other thread as a reference. Other thread for reference... -
Attributes be added to factor the outcome of Incremental numbers
u4ea2u2 replied to u4ea2u2's topic in AutoLISP, Visual LISP & DCL
The other thread (page 1) is the source of Lee mac's code and Terry.T's addition to select block to receive the incremental numbers. Admin moved this request to this new thread. After realized this I posted same thing here. Sorry for the confusion. Adm can delete my request there if needed. From the original code ( assigns incremental numbers to a Port_Number attribute of all instance of one block) I'm wondering if 2 things can happen: 1st of multiple instance of one block, if matching attribute values in a Part_Number attribute exists in 2 or more blocks, those blocks receive the same or matching incremental number in their Port_Number attribute. 2nd is the code decides, when assigning incremental numbers, the order of those numbers to which blocks receive a # based on priority levels from 3 attributes. Sort_Order is attribute 1st priority. If values match in Sort_Order the code looks to Sort_Order2's attribute value. If they match there also then the code looks to Sort_Order3's value before assigning incremental numbers. Attached is a cleaner file to test. Blocks (been exploded) on the left "example" is the end result. Blocks on the right one can test code on them. hope this helps. Thanks PNO TEST-LSP FOR NUMBING4.dwg -

Dynamic Block w/Rotation and Stretch
ahmad34 replied to Bill Tillman's topic in AutoCAD Drawing Management & Output
Thanks for sharing Datvo -
You can't use two visibility parameters in the same dynamic block. — What if I want to switch between dimensions and versions? — The most common approach is to create a combined visibility state, such as "A1 - Bidding Version" or "A1 - Construction Version." — Does that sound like more states to manage? — Yes, it's more cumbersome, but this is a limitation of AutoCAD dynamic blocks. If you want more flexibility, consider using a lookup table or attribute field.
-
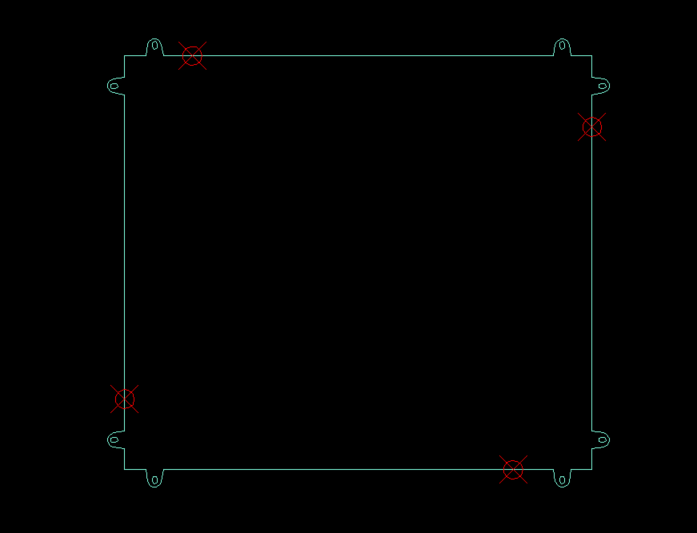
Please have a look at this, it makes a rectang then you can add the "TAB" to any side, even on an angle. The red points are the pick points working in a clock wise direction, if you pick wrong end the TAB will go inwards. I made a Block called " TAB" and used your dwg to set the edge distances. I did adjust the block ever so slightly it had like 33.70123 so set it to 33.7. here is also your dwg with the TAB block added. If your happy will add the Squares, again based on the rectang size. (defun c:wow ( / oldsnap pt1 pt2 pt3 pt4 ang tabwid) (setq oldsnap (getvar 'osmode)) (setq oldang (getvar 'aunits)) (setq ht 800.0 tabedge 41.0 tabwid 33.7) (setq pt1 (getpoint "\nPick 1st point ")) (setq len (getdist pt1 "\nPick 2nd point ")) (setq pt2 (mapcar '+ pt1 (list len 0.0 0.0)) pt3 (mapcar '+ pt1 (list len ht 0.0)) pt4 (mapcar '+ pt1 (list 0.0 ht 0.0)) ) (setvar 'osmode 0) (setvar 'aunits 3) (command "Line" pt1 pt2 pt3 pt4 "c") (while (setq ent (entsel "\nPick near start end - Enter to stop ")) (setq ept (cadr ent)) (setq ent (car ent)) (setq entg (entget ent)) (setq start (cdr (assoc 10 entg))) (setq end (cdr (assoc 11 entg))) (setq len2 (distance start end)) (setq d1 (distance ept start)) (setq d2 (distance ept end)) (if (> d1 d2) (progn (setq temp start) (setq start end) (setq end temp) ) ) (setq ang (angle start end)) (setq pt5 (polar start ang tabedge)) (setq pt6 (polar pt5 ang tabwid)) (command "break" ent pt5 pt6) (command "insert" "TAB" pt5 1 1 ang) (command "explode" (entlast)) (setq pt5 (polar start ang (- len2 tabwid tabedge ))) (setq pt6 (polar pt5 ang tabwid)) (command "break" ent pt5 pt6) (command "insert" "TAB" pt5 1 1 ang) (command "explode" (entlast)) ) (setq pt3 (mapcar '+ pt3 (list 40 40 0.0))) (setq pt1 (mapcar '+ pt1 (list -40 -40 0.0))) (command "join" "w" pt3 pt1 "") (setvar 'osmode oldsnap) (setvar 'aunits oldang) (princ) ) (c:wow) The array does have a pattern so your multi if's could become as simple, as (fix (- (/ length 75) 1)) just try it. Vertical rows is 9 for 800. (setq col (fix (- (/ 1220.234 75) 1))) (setq bname (strcat "*Infil_sq_" (rtos col 2 0))) Is the length overall or the distance between the centre points of the slots. Can fix length to match. Need you to confirm what this length is based on. Infil Panels AutoLisp Test-TAB.dwg

-
I still think much easier to just select a line or pline near an end, then draw the tab based on some sort of sizes criteria, after doing the code i realised only really need one draw tab portion so can be on any segment and a bonus at any angle of the selected P/Line. The tab would be drawn and a simple flip to set it to inside or outside. You can pick say 4 times very fast. Even shapes would work. Why not just have the tab as a block, much easier to work with. Will have a think about it. Oh yeah I think the infill can be done as an array rather than having lots of blocks. Found your post over at forums/autodesk as well.
-
Attributes be added to factor the outcome of Incremental numbers
BIGAL replied to u4ea2u2's topic in AutoLISP, Visual LISP & DCL
You should remove your other post. It is confusing to have two posts. I sorted all the blocks in that dwg. Still not sure your criteria for changing which attribute value. (("DATAPORT NUMBER" "APPLE" "" "1200" "1" "") ("DATAPORT NUMBER" "Box" "" "1250" "" "") ("DATAPORT NUMBER" "Box" "" "1250" "" "") ("DATAPORT NUMBER" "CHERRY" "" "1200" "001" "Yesterday") ("DATAPORT NUMBER" "Cheeze" "" "1800.9" "1" "Now") ("DATAPORT NUMBER" "Chocolates" "" "1350" "" "") ("DATAPORT NUMBER" "DD3" "" "1000" "001" "") ("DATAPORT NUMBER" "Milk" "" "1700" "1" "Never") ("DATAPORT NUMBER" "Milk" "" "1700" "1" "Never") ("DATAPORT NUMBER" "PEACH" "" "1200" "001" "Tomorrow") ("DATAPORT NUMBER" "PEACH" "" "1200" "001" "Tomorrow") ("DATAPORT NUMBER" "PEAR" "" "1200" "001" "Tomorrow") ("DATAPORT NUMBER" "PIE" "" "1100" "003" "") ("DATAPORT NUMBER" "PIE" "" "1100" "003" "") ("DATAPORT NUMBER" "Picles" "" "1400" "" "") ("DATAPORT NUMBER" "Yogurt" "" "1800.9" "2" "")) -
Attributes be added to factor the outcome of Incremental numbers
BIGAL replied to u4ea2u2's topic in AutoLISP, Visual LISP & DCL
I posted elsewhere about sorting attributes say up to 5 attributes deep and a list Is made, the next step is the list is counted so the same block attributes have a count added. Eg (002 1100 001 3) so 3 the same exists. Your other post ? So in your data you have say 2 x Box, milk, peach and so on. So what do you do to fix ? (("DATAPORT NUMBER" "APPLE" "" "1200" "1" "") ("DATAPORT NUMBER" "Box" "" "1250" "" "") ("DATAPORT NUMBER" "Box" "" "1250" "" "") ("DATAPORT NUMBER" "CHERRY" "" "1200" "001" "Yesterday") ("DATAPORT NUMBER" "Cheeze" "" "1800.9" "1" "Now") ("DATAPORT NUMBER" "Chocolates" "" "1350" "" "") ("DATAPORT NUMBER" "DD3" "" "1000" "001" "") ("DATAPORT NUMBER" "Milk" "" "1700" "1" "Never") ("DATAPORT NUMBER" "Milk" "" "1700" "1" "Never") ("DATAPORT NUMBER" "PEACH" "" "1200" "001" "Tomorrow") ("DATAPORT NUMBER" "PEACH" "" "1200" "001" "Tomorrow") ("DATAPORT NUMBER" "PEAR" "" "1200" "001" "Tomorrow") ("DATAPORT NUMBER" "PIE" "" "1100" "003" "") ("DATAPORT NUMBER" "PIE" "" "1100" "003" "") ("DATAPORT NUMBER" "Picles" "" "1400" "" "") ("DATAPORT NUMBER" "Yogurt" "" "1800.9" "2" "")) -
Thank you for your advice
-
Thank you very much. That works perfectly
-
You can null these 2 defuns
- Last week
-
Break an object at 2 points and replace the properties of the line
GLAVCVS replied to Nikon's topic in AutoLISP, Visual LISP & DCL
The user can always activate the object snapping option using F3. The reason I left this option is in case the user ever needs to reference the geometry of other nearby objects. -

Break an object at 2 points and replace the properties of the line
devitg replied to Nikon's topic in AutoLISP, Visual LISP & DCL
Why not use (setvar 'osmode 512) ; as per NEAREST (setq pt1 (getpoint "\nSelect the first break point: ") ;; Entering the first break point pt2 (getpoint "\nSelect the second break point: ") ;; Entering the second break point ep nil ) So point will be at select entity and not need to get the closestpoint (setq pt1 (vlax-curve-getClosestPointTo (vlax-ename->vla-object ent) pt1) pt2 (vlax-curve-getClosestPointTo (vlax-ename->vla-object ent) pt2) ) -
use this PEDIT WAY (command "._PEDIT" topline "_J" "all" "" "" ) ;topline infilHL bottomline infilHR "" "_j" "" "")
-
Please upload this defun (savevartoold) (infilpanellayer)
-
Read up on cond. better way to test/decide what block to insert. (cond ((and (>= dist1 145) (< dist1 220)) (command "-insert" "*Infil_sq_1" p7 "" "" "") ) ((and (>= dist1 220) (< dist1 295)) (command "-insert" "*Infil_sq_2" p7 "" "" "") ) ((and (>= dist1 295) (< dist1 370)) (command "-insert" "*Infil_sq_3" p7 "" "" "") ) ... ((and(>= dist1 1195) (< dist1 1270)) (command "-insert" "*Infil_sq_15" p7 "" "" "") ) (T ;if all other condtions fail (alert "\nDistance Greater than 1270") ) )
-
Hi All. This time I have included my files to give you a better idea of what i'm trying to acheive Thanks for the ideas. I have used the PEDIT approach and it has almost worked. It joins 3 of the entities but not the 4th. The program runs right through. Any ideas why the 4th entity won't join?? Ive included my DWG file for you to have a look and also my lisp routine. The bulk of the routine works well its just the join command Regards tony Horozontal Infil.lsp Infil Panels AutoLisp Test.dwg
-
Attributes be added to factor the outcome of Incremental numbers
u4ea2u2 replied to u4ea2u2's topic in AutoLISP, Visual LISP & DCL
I got to thinking.. if blocks represent parts and multiple similar Parts exists the same assigned number should be same for similar parts. So after adding Part_Number attribute could the lisp runs the below results? (graphically like column order in a table, but the way the order lisp sorts). I see issues if Part_Number and other Sort Orders values don't match when hoping for blocks with same part number to be assigned same Dataport Number. So there would need to be a warning if that occurs. Hope this makes sense. DATAPORT_NUMBER --> order by--> | Sort_Order | Sort_Order2 | Sort_Order3 | <--Part_Number "001" --> "1000" "001" "" <-- "DD3" "002" -->"1100" "003" "" <-- "PIE" "002" -->"1100" "003" "" <-- "PIE" "003" -->"1200" "1" "" <-- "APPLE" "004" -->"1200" "001" "Tomorrow" <--"PEAR" "005" --> "1200" "001" "Tomorrow"<--"PEACH" "005" -->"1200" "001" "Tomorrow" <--"PEACH" "006" -->"1200" "001" "Yesterday" <--"CHERRY" "007" -->"1250" "" "" <--Box "007" -->"1250" "" "" <--Box "008"-->"1350" "" "" <- Chocolates "009" -->"1400" "" "" <--Pickles etc PNO TEST-LSP FOR NUMBING3.dwg -
Attributes be added to factor the outcome of Incremental numbers
u4ea2u2 replied to u4ea2u2's topic in AutoLISP, Visual LISP & DCL
I got to thinking.. if blocks represent parts and multiple similar Parts exists the same assigned number should be same for similar parts. So after adding Part_Number attribute could the lisp runs the below results? (graphically like column order in a table, but the way the order lisp sorts). I see issues if Part_Number and other Sort Orders values don't match when hoping for blocks with same part number to be assigned same Dataport Number. So there would need to be a warning if that occurs. Hope this makes sense. DATAPORT_NUMBER --> order by--> | Sort_Order | Sort_Order2 | Sort_Order3 | <--Part_Number "001" --> "1000" "001" "" <-- "DD3" "002" -->"1100" "003" "" <-- "PIE" "002" -->"1100" "003" "" <-- "PIE" "003" -->"1200" "1" "" <-- "APPLE" "004" -->"1200" "001" "Tomorrow" <--"PEAR" "005" --> "1200" "001" "Tomorrow"<--"PEACH" "005" -->"1200" "001" "Tomorrow" <--"PEACH" "006" -->"1200" "001" "Yesterday" <--"CHERRY" "007" -->"1250" "" "" <--Box "007" -->"1250" "" "" <--Box "008"-->"1350" "" "" <- Chocolates "009" -->"1400" "" "" <--Pickles etc PNO TEST-LSP FOR NUMBING3.dwg