Leaderboard


Popular Content
Showing content with the highest reputation on 05/12/2025 in all areas
-
This method is used quite a lot by @ronjonp so search in this forum then you should find many elegant and decent routines by him as I personally like reading his.2 points
-
@pkenewell I found this a while back and have it in my Change Color of Text LISP https://forums.autodesk.com/t5/visual-lisp-autolisp-and-general/multileader-text-color/m-p/7424985#M3595952 points
-
That is possible - a great learning opportunity... have a go and come back with any questions maybe?2 points
-
If there was, I would have included it in my list of examples.2 points
-
Hi I don't know what 'drawing' contains. Try replacing it with (vla-get-activeDocument (vlax-get-acad-object))1 point
-
For what it's worth, I may have something that does it all, like stated, you need to give it a try. You seem pretty demanding and wanting all kinds of options, not mentioned originally. I'm not that smart, but I learned to tweak a LISP a long time ago. Also, it's easy enough to make each LISP a shortcut, so simply load both LISPs and type one shortcut for DimText and the other for the rest.1 point
-
I think that you can't use entmod to change the names of the layouts, because the entmod is meant to use in modifying the definition data of an object (entity).1 point
-
If you want to use entmod, you need the following: ;; Example (setq ent (car (entsel)) ;; select entity polyline, circle, arc, etc. data (entget ent) ;; get data definition of the selected entity old_layer (cdr (assoc 8 data)) ;; get the name of the layer ) ;; inside the " " you can put the desired name (entmod (subst (cons 8 "new_layer") (cons 8 old_layer) data)) ;; NEW ;; OLD ;; data definition ....... rest of the code......1 point
-
Try changing (if (= x lytname) to (if (= (vla-get-name x) lytname)1 point
-
change this : ("*EN-LITE-CIRC . 160) to this ("*EN-LITE-CIRC" . 160) and if you want to keep this line ERROR WTF MAYBE MAKE NEW SCRIPT ----------------------------------------------- LAYCOL add a ;; before the line as bigal pointed out ;;ERROR WTF MAYBE MAKE NEW SCRIPT ;;----------------------------------------------- ;;LAYCOL1 point
-
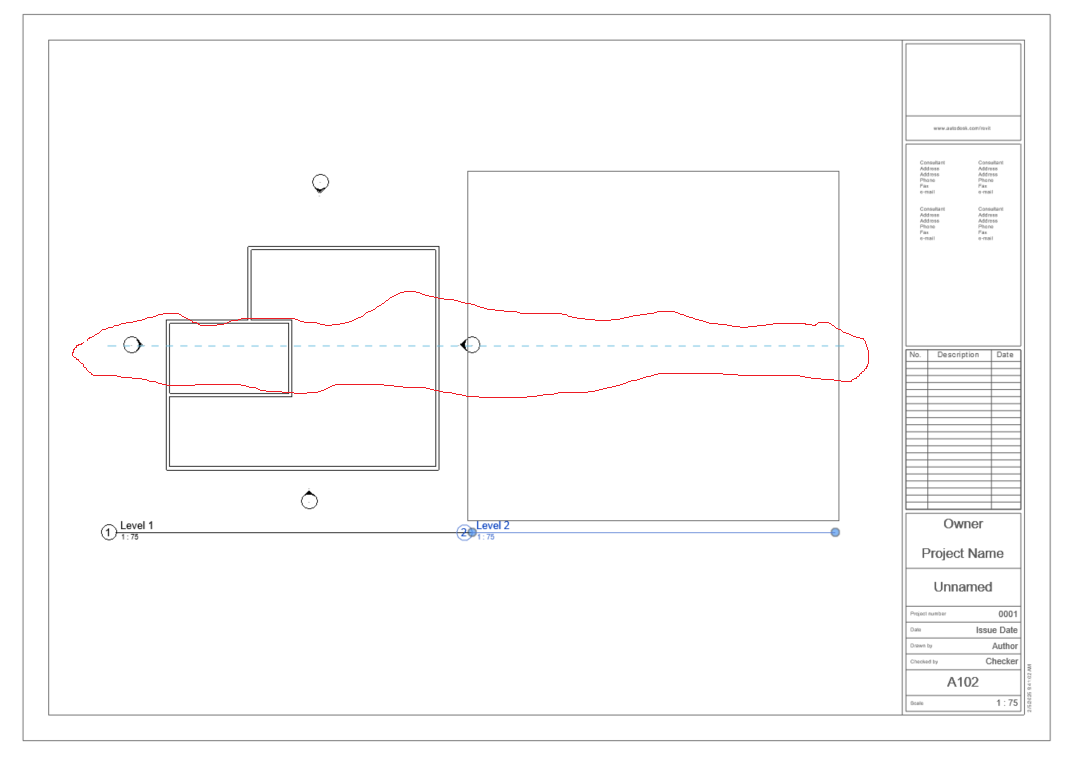
It's fairly simple, as you can see in my example, while dragging the Level 2 Views into my sheet, an "ant line" (clouded in RED in the attached image) appears aligning your Level 2 view to the view beside it which is Level 1. You can also do this while aligning the View Title below the views. For some reason, I cannot attach a GIF screen recording so I just zip it up and attached it here. Kindly download and unzip on your side to see a better example. Hope this helps. Align Views.zip
 1 point
 -
Try this one, roughly done... You can adjust the number of panels according to your need (No of Panels parameter) You can also turn on/off the window trim (the concrete surround with section 100mm x 100mm. around all windows that you mention) You can choose between Single and Multiple Panels by adjusting the MODE parameter value. 0 for Single, 1 for multiple. Top Hung Wdw.rfa1 point
-
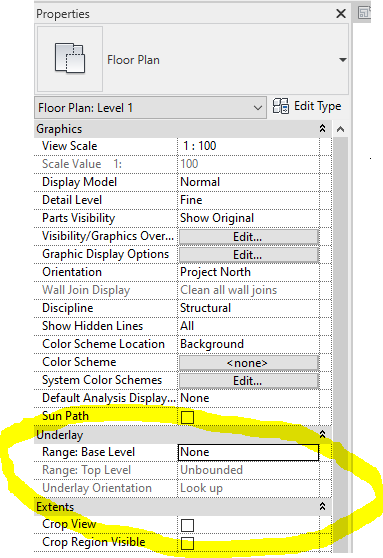
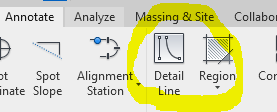
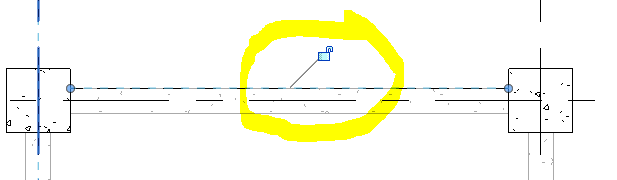
In the view where you want to show the beam or lintel as hidden line, Look into your properties panel. In the Range : Base Level, Select your current level. For the Range Top Level, select the level where the beam resides. Make sure Look Up is selected in the "Underlay Orientation". When the beam shows up in your plan, go to Annotate Tab and pick Detail Line. Use pick lines (Yellow Circle) and select your Line Style (red circle) select <Overhead> or hidden line. and pick your beam. Make sure to lock the line with the beam so that when the beam changes, the line follows Once done, go back to the Properties > Underlay and select None for both Range :Base Level and Range : Top Level Hope this helps.
1 point
-
Click that Green Floor and Edit it's boundary (Under Modify Tab). Create the Building Boundary inside.1 point
-
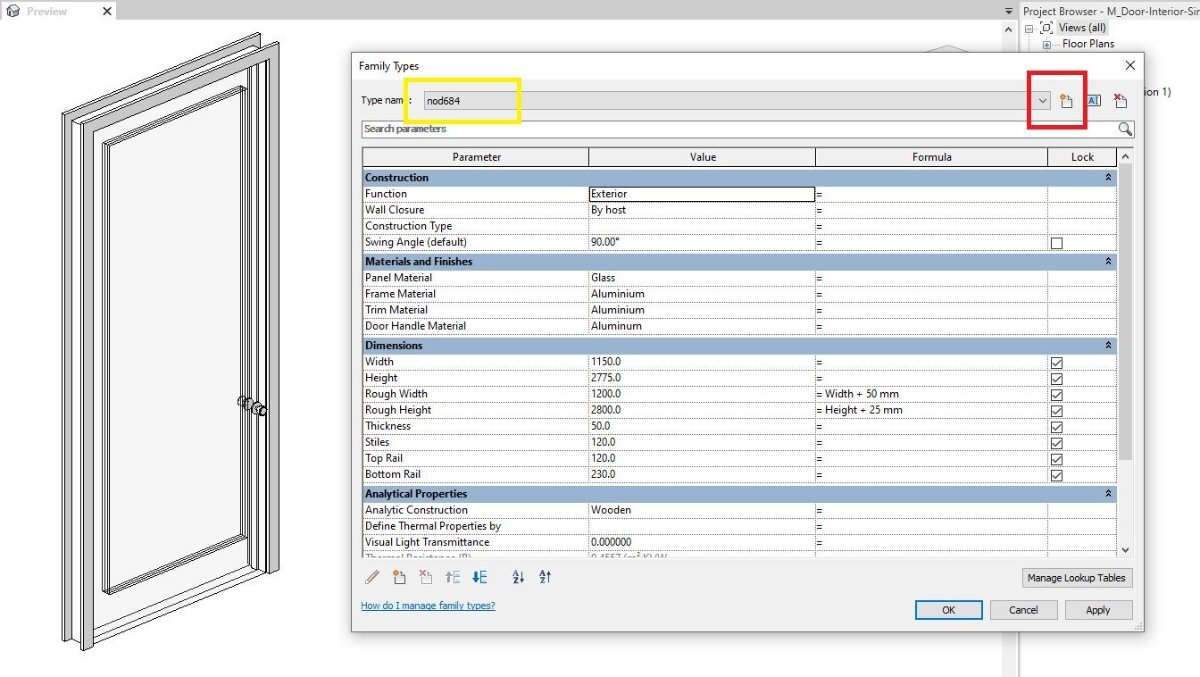
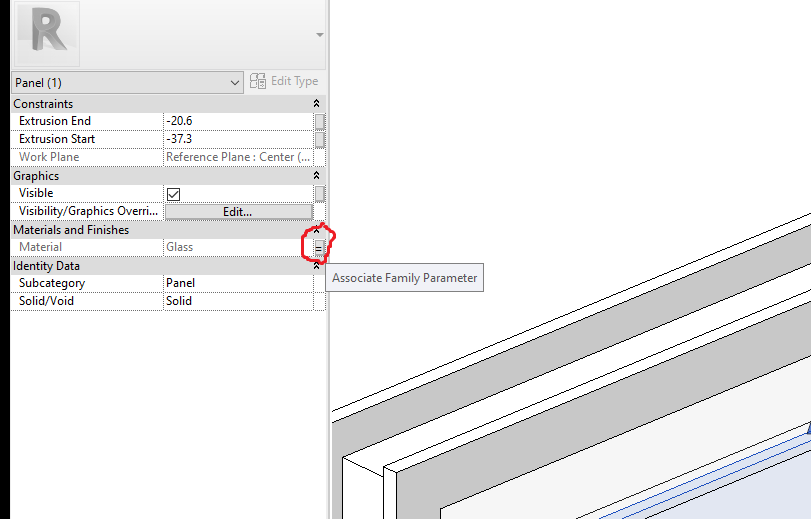
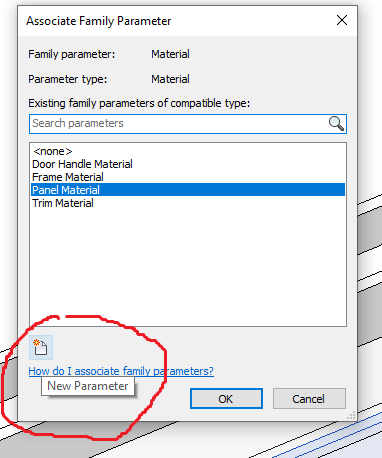
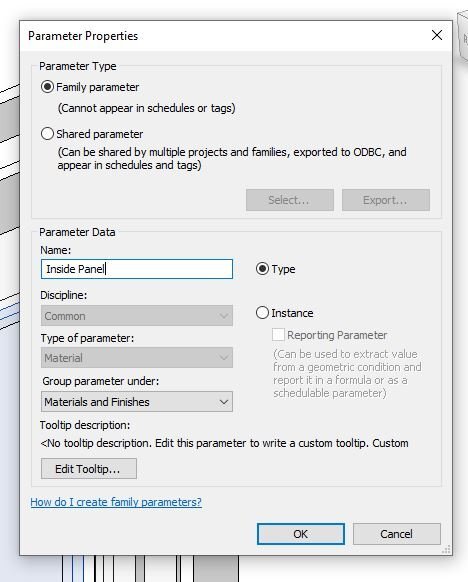
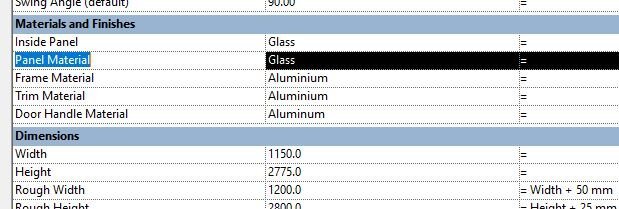
have you solve this? What you can do is create a New Type (click the button mark with Red rectangle and assign a new name ( Marked in yellow Rectangle in my case. Click on the panel that you need to assign the glass material and create a new Parameter for the inside Panel so you can assign a separate material for that. To do that you need to click the red circle in the image below :. Associate a New Parameter by clicking the encircle button Assign a parameter name , in this case I use Inside Panel. Once done, you can assign a separate material for your inside Panel (Glass) and your Panel Material (aluminum) Sorry my screen recording app is not working so I just use screenshots. Post if you still have concerns...
1 point
-
NEVERMIND!!! I happily found a successful workflow via Dynamo. If anyone is wondering how to do it follow this youtube video. Take care, Lando1 point