

The Interface
Introduction
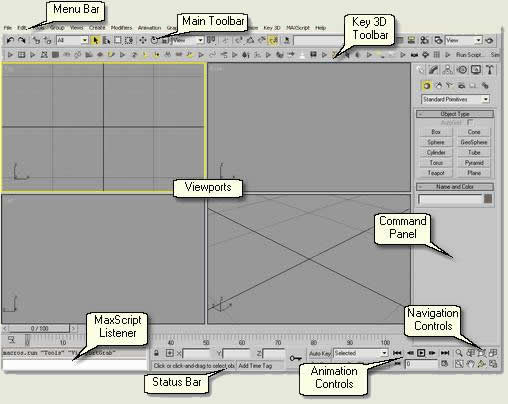
This tutorial gives a brief explanation of the MAX interface items commonly used and introduces you to the important areas of the interface. Explanations of how to use certain tools and how they fit into the workflow is the subject of subsequent Key Fundamentals
Download Sample Data
kf101_files.zip (16kb)
The Menu Bar
The menu bar is a good place to start exploring the functionality of MAX / VIZ. Other commands are accessed elsewhere, either on the toolbars, command panel, quad menus or via keyboard shortcuts. Key Fundamentals covers the following menus as an introduction to the MAX / VIZ interface (shaded items)
![]()
The Main Toolbar
Explore the following commonly used items on the Menu Bar:
Undo / Redo
![]()
- Use these buttons to undo or redo. The amount of undos can be changed on the General Tab of the Preferences dialog
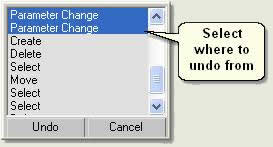
- Right click over the undo button to display a list of recent operations. The point at which the user wants to undo from can be selected. This also works for redo's
Selection Tools
![]()
- Place your cursor over the icons to reveal tool tips and press:
- Select Object the button turns orange and objects can then be selected by left clicking over the object in a viewport
- Select by Name opens the Select Objects dialog where objects can be selected in many ways
- Region Option buttons Press and hold to reveal a sub-menu of different region select modes
- Selection Filter - dropdown filter list to restrict selectable objects by type
- Window / Crossing toggle button toggles between crossing and window regions
These tools are further explained in Working with Objects
Transform Tools
![]()
- Place your cursor over the first three icons to reveal tool tips:
Select and Move
Select and Rotate
Select and Scale
- Press Select and Move - notice the button turns orange. These are modal buttons. When in the Select and Move mode (button is orange) objects can be transformed by moving. If the button is not highlighted objects cannot be moved. The same applies to Select and Rotate and Select and Scale
- With the button in Select and Move mode (button is orange) right click over the button. This displays the Move Transform Type-in floater
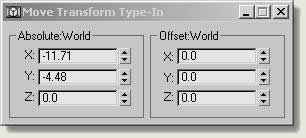
This 'floater' is used to accurately move objects by typing values for X,Y,Z
- With the floater still displayed press Select and Rotate and Select and Scale Note that the Transform Type-in dialog changes to suit. Close the Transform Type-in floater by clicking on the X at the top right of the window
- Press the Reference Coordinate System list down arrow - this allows you to transform objects using different coordinate reference systems. The View option is the most used for landscape work, using the viewports to transform objects Up and Down (Left or Front viewports for example) or Left and Right (Top viewport). However, the Local option is sometimes used when modellling objects
Transform tools are further explained in 'KV02 Working with Objects'
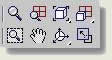
Snap Tools
![]()
- Place the cursor over the icons to reveal tool tips:
3D Snap Toggle
Angle Snap Toggle
Percentage Snap Toggle
Spinner Snap Toggle
- Right click over any of the first three buttons to display the Grid and Snap Settings dialog This is where you change snap settings for snapping to different parts of an object or grid
- Right click over the Spinner Snap Toggle This opens the Preferences dialog to change spinner snap settings
Snap tools are further explained in 'Working with Objects'
Named Selection Sets
![]()
This is where you can name 'Selection Sets' for selecting multiple objects using the list. They are further explained in 'KV02 Working with Objects'
Layer Manager
![]()
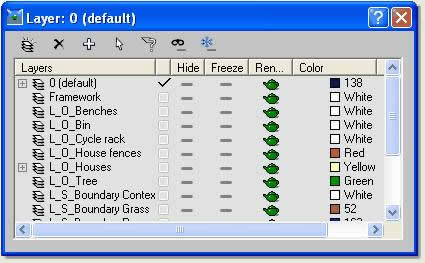
The Layer Manager organises and manages layers imported directrly from AutoCAD and can be used in conjunction with other object management tools. It is not covered in depth in Key Fundamentals but should be studied later
Materials and Rendering
![]()
- Place your cursor over the icons and list box to reveal tool tips:
Material Editor - opens the Material Editor dialog
Render Scene - opens the Render Scene dialog
Render type - options for rendering. 'View' and 'Region' are the most used
Quick Render - renders the active viewport with the current render settings
These features are further explained in 'KV04 Lighting, Materials and Production'
Viewports

The viewports enable you to view any part of the scene or any part of an object and are highly configurable for many modelling purposes. The configuration of viewports and how to navigate in 3D space is explained later in the tutorials
Command Panel

The Command Panel contains commands for creating and modifying objects, for assigning controllers for animation, display functions and extra utilities. Although many commands can be accessed elsewhere on the Menu Bar, toolbars and quad menus, Key Fundamentals uses the Command Panel to lead you through the modelling process
Navigation Tools
The navigation tools are an important element to master when learning to use MAX / VIZ. To easiliy navigate around objects and the scene in 3D space is the first step to being efficient and feeling comfortable with the programme. These tools are explained later in this tutorial
Animation Controls
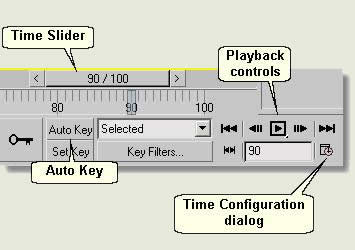
Time slider - shows the available frames and using the slider you can move animated objects in the scene
Auto Key
- move the Time Slider to a frame number in an animation and select an object. Press Auto Key to start the object animation. Move the object and adjust the time slider forwards. Then deselect the Auto Key button. The object's movement is animated for this length of time and can be seen to move by moving the Time Slider
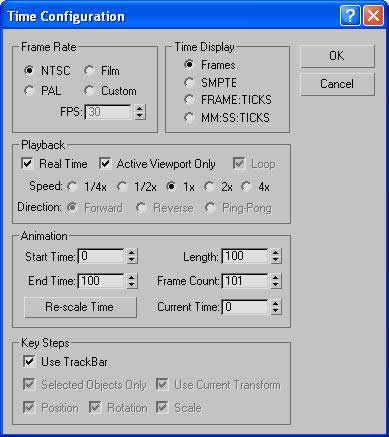
Time Configuration dialog
- Press Time Configuration to open the Time Configuration dialog. This is where the number of frames available and number of frames per second playback are configured
Playback controls - the animation can be played in the viewports using these buttons
Animating cameras and objects is covered in 'KV04 Lighting, Materials and Production'
Status Bar
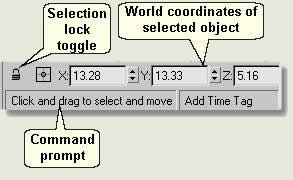
The Status bar gives information regarding the position of the selected object and a prompt for available commands
Selection Lock Toggle - a useful button to keep the selection of objects locked whilst navigating around the scene
Maxscript Listener
The MAXScript Listener enables repetative tasks to be recorded and macros to be quickly setup on toolbars. This is not covered in Key Fundamentals
Right-Click Menus and Quad Menus
MAX / VIZ enables the user to access commands in a number of ways. As well as using the commands from the Menu Bar, Main Toolbar and Command Panel, right click menus and quad menus offer other ways of implementing your favourite commands
- Open kf101_01.max. This scene contains a simple sphere object
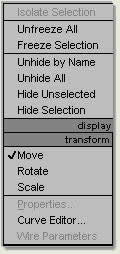
- Place the cursor in a blank space in the viewport and right click. This menu is displayed. This is an example of a Quad Menu using just two sub-menus (display and transform) from a possible four. Quad Menus are displayed when you right click in a viewport
- Select the sphere and right click again. Other options on the Quad Menu become available (black and not grey) that pertain to the type of object selected
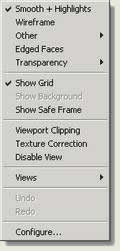
- Position the cursor over the word 'Perspective' to the top left of the viewport and right click. This menu is displayed
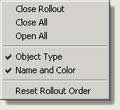
- Position the cursor over a blank space on the Command Panel and right click. This menu is displayed
Right click menus and Quad Menus are well used feature of MAX / VIZ. Practice right clicking over parts of the interface, even icons, to access a variety right click menus
Donate to CADTutor
If you found this tutorial useful, you might like to consider making a donation. All content on this site is provided free of charge and we hope to keep it that way. However, running a site like CADTutor does cost money and you can help to improve the service and to guarantee its future by donating a small amount. We guess that you probably wouldn't miss $5.00 but it would make all the difference to us.
Local Navigation
Sponsored Links
The Basics
- Dual Dimensions in a Dim…
- UCSICON Options
- "Best of" Basics: Irreg…
- Tool Palette Basics
- Original Dimension Value
- Possible Solutions to th…
- Avoid Using 'Standard' i…
- Shorten the Plot Scales…
- Update the Source File B…
- User Increment Angles fo…
- Drawing Information
- 'Sign Language'
- Rotate with the Copy Opt…
- Use the INSERT Osnap on…
- To or From the Current L…


