

Scaling Images
See also, All About Images & Using Images
Introduction
From time to time, you may need to use a raster image to trace off information. For example, you may want to use a map base to draw the line of a road or to draw some contours. In the past, this would have been done using a digitising tablet and although AutoCAD still supports the use of tablets, the new image support options have, in many respects, made them redundant.
However, the only way to create an accurate drawing from a raster image is to accurately scale it. AutoCAD can help to scale some images if the file format contains information about the image resolution. This is more likely to be a special case rather than a general rule. The technique described below can be used to scale any raster image in such a way that units on the scanned map or plan correspond to AutoCAD drawing units. It works even if you do not know the image resolution. The only piece of information that you need is a known length that is easily identifiable on the plan. The length of a wall, the width of a road or the distance between grid lines can all be used to scale a raster image providing you can accurately pick each end of the measured length.
If you have little or no experience of working with images in AutoCAD and you would like to learn more, it is recommended that you work through the All About Images tutorial and then have a go at the corresponding Using Images exercise.
 |
If you have experience of working with images in AutoCAD but you need a reminder of some of the finer points, you can use the QuickFind toolbar (above) at any time to get information about a particular command.
Step 1 - Sample Data
- Download sample data
If you would like to follow this exercise step by step, you may like to download the map image, shown on the right. To download the file, right-click on the document icon below and select "Save Target As…" from the menu ("Save Link As…" in Netscape Navigator). Save the file in your working folder.
![]() Map Image.jpg (177KB) - JPEG File
Map Image.jpg (177KB) - JPEG File
The sample image is a 3km X 3km extract from an Ordnance Survey 1:50,000 scale map. The physical size of the image is 600 X 600 pixels. Using this information, you could easily work out the scale factor to display the raster map with drawing units set to metres. AutoCAD always inserts images in such a way that their width is one drawing unit in length when the scale is set to 1. We could, therefore, work out that in order to correctly scale this sample image in metres, all we need to do is set the scale factor to 3000, the width of the image being 3000 metres. However, this is a special case and you may not always know the true width of an image.
Step 2 - Attaching the Image
- Start a New Drawing
- Create a New Layer
- Attach Map Image.jpg
Start AutoCAD if you have not already done so and create a new drawing. Use the Layers command ![]() to create an new layer called "Map Image" and set it to be current.
to create an new layer called "Map Image" and set it to be current.
Next, start the Attach Image command from the Reference toolbar ![]() . When the Select Image File dialogue box appears, navigate to your work folder and select the Map Image.jpg file.
. When the Select Image File dialogue box appears, navigate to your work folder and select the Map Image.jpg file.
The dialogue box should now look something like the one shown above. To complete the selection, click on the "Open" button. When the Image dialogue box appears, deselect all options. The dialogue box should look like the one illustrated below.

Click the "OK" button to proceed. Since all options were deselected, the image is automatically inserted with default settings. The lower-left corner of the image is at the drawing origin (0,0) and the image width is one drawing unit.
Use the Zoom Extents command, View![]() Zoom
Zoom![]() Extents from the pull-down menu or
Extents from the pull-down menu or ![]() from the toolbar, so that the map image fills the drawing window.
from the toolbar, so that the map image fills the drawing window.
Step 3 - Scaling the Image
- Scale the image using the Reference option
By default, the Scale command requires the user to enter a scale factor in order to accurately scale an object. For example, if you wanted to double the size of an object, you would enter a scale factor of 2. The scaling of raster images is rarely this straightforward. In order to determine the scale factor for any given image, you would need to know the current distance between two known points on the image (expressed in drawing units) and the actual distance between the same two points in the real world (expressed in your chosen unit, usually metres or millimetres). Given this information, the scale factor can be calculated by dividing the actual distance by the image distance. For example, we know that the width of the Map Image is one drawing unit (because the insert scale was set to 1). We also know that the actual width of the Map Image is 3km or 3000 metres. So, to scale the image correctly in metres, the scale factor would be 3000/1 = 3000.
This method works perfectly well for most situations. You could use the Distance command, ![]() from the toolbar or Tools
from the toolbar or Tools![]() Inquiry
Inquiry![]() Distance from the pull-down menu to measure an image distance and then divide this into the known or "real world" distance to come up with a scale factor. However, there is an easier way that avoids the necessity for measurement.
Distance from the pull-down menu to measure an image distance and then divide this into the known or "real world" distance to come up with a scale factor. However, there is an easier way that avoids the necessity for measurement.
 The Scale command has an option that can be used to scale an object simply by reference to two pick points and a known true distance. It works in a similar way to the method described above except that AutoCAD automatically measures the distance and calculates the scale factor for you. For this exercise, we will use the two upper grid intersections as the pick points and the true distance between them (1000 metres).
Follow the sequence below to correctly scale the Map Image in metres.
Start the Scale command, Modify![]() Scale from the pull-down or
Scale from the pull-down or ![]() from the Modify toolbar.
from the Modify toolbar.
Command: SCALE
Select objects: (pick the Map Image frame to select it)
Select objects: ![]()
Specify base point: (pick any point or enter 0,0 if you want the lower left corner of the image to remain at the drawing origin)
Specify scale factor or [Reference]: R
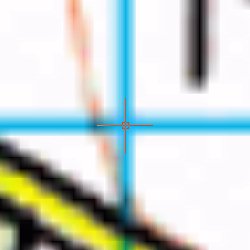
Specify reference length <1>: (zoom in ![]() and pick the point where the grid lines cross)
and pick the point where the grid lines cross)
Specify second point: (zoom out ![]() and then zoom in
and then zoom in ![]() on the second grid intersection and pick the point)
on the second grid intersection and pick the point)
Specify new length: 1000
 |
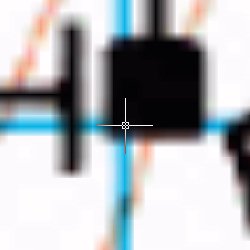 |
| Zoom in and pick first point | Zoom in and pick second point |
Obviously you cannot use the Object Snaps to accurately pick points on a raster image. The only way to achieve a reasonable accuracy is to zoom in as far as possible and pick as precisely as you can. As you can see from the illustrations above, this is not always easy, the closer you get to a raster image line, the wider it becomes. This is not ideal but you should be able to achieve accuracy to within a fraction of one percent which is acceptable for most purposes.
Finally, zoom extents ![]() to display the full image. The Map Image is now correctly scaled in metres. You can always check this by using the Distance command
to display the full image. The Map Image is now correctly scaled in metres. You can always check this by using the Distance command ![]() to pick the same two points. You should see that the distance is 1000 drawing units (or thereabouts, depending upon the accuracy of your pick). You can now "trace" over the raster image using all of the usual AutoCAD commands such as Line and Polyline. Any vector drawing objects thus created will be correctly scaled in metres.
to pick the same two points. You should see that the distance is 1000 drawing units (or thereabouts, depending upon the accuracy of your pick). You can now "trace" over the raster image using all of the usual AutoCAD commands such as Line and Polyline. Any vector drawing objects thus created will be correctly scaled in metres.
If you need more background information on the use of images with AutoCAD, see the tutorial All About Images and complete the exercise Using Images.
Donate to CADTutor
If you found this tutorial useful, you might like to consider making a donation. All content on this site is provided free of charge and we hope to keep it that way. However, running a site like CADTutor does cost money and you can help to improve the service and to guarantee its future by donating a small amount. We guess that you probably wouldn't miss $5.00 but it would make all the difference to us.
Local Navigation
Sponsored Links
The Basics
- Dual Dimensions in a Dim…
- UCSICON Options
- "Best of" Basics: Irreg…
- Tool Palette Basics
- Original Dimension Value
- Possible Solutions to th…
- Avoid Using 'Standard' i…
- Shorten the Plot Scales…
- Update the Source File B…
- User Increment Angles fo…
- Drawing Information
- 'Sign Language'
- Rotate with the Copy Opt…
- Use the INSERT Osnap on…
- To or From the Current L…


