

 From: AutoCAD Productivity Articles #126
Originally published: June 2013
Block to .DWG with Wblock
 When collaborating with others, their drawing may have a block that you would like to use in future drawings.
One approach would be to add the block to a tool palette, but in the case of my friends at Gerdau Ameristeel, they needed to make adjustments to some of the machine part blocks for US compliance.
Solution: Wblock.
Briefly, the Wblock command [Write Block] has a dual purpose. The most common use of Wblock is to create a .DWG from selected entities in the current drawing, (see Michael's Corner, June 2006, or p. 103 in The AutoCAD Workbench, 2nd Edition).
The other use for Wblock is to create a .DWG from an existing block in the current drawing. This is where they got the term "write block"; you are writing a block definition to the disk as a .DWG file.
How to Create a .DWG from a Block
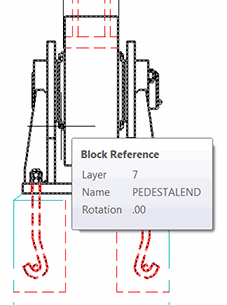
First, to optimize the application, click on the block in the drawing that you want to turn into a .DWG. This is the trick I learned from the guys at Gerdau.
Launch the Wblock command by typing W to open the Write Block dialog box. Notice that the name of the selected block is already in the dropdown list at the top of the dialog box.
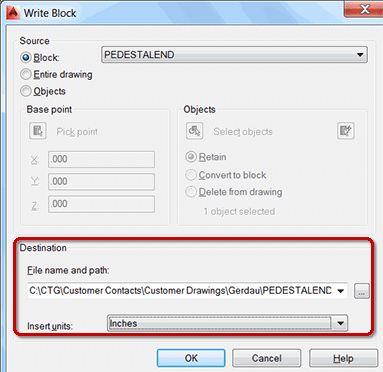
Under Destination, click the ellipsis (browse dots), to open the Browse for Drawing File dialog box.
Navigate to the desired folder, enter a name for the resulting drawing, then click Save. You will be returned to the Write Block dialog box.
Confirm the desired Insert Units, then click OK. You will see a very brief flash of a small window in the upper left corner of your screen as the .DWG is being saved.
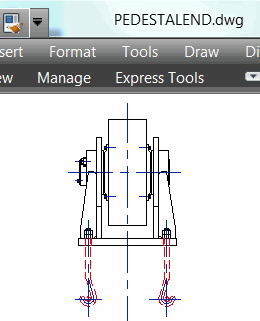 You now have a physical .DWG that consists uniquely of the geometry of the block in the source drawing.
Note: Any block geometry that was on a layer that was frozen when the Wblock command was used—such as the blue Centerline layer shown here—will still be present in the final .DWG since it was originally part of the block when it was created. Just because the layer was frozen didn't make it any less a part of the block definition.
See all the articles published in June 2013
See this article in the June 2013 Corner
Donate to CADTutor
If you found this article useful, you might like to consider making a donation. All content on this site is provided free of charge and we hope to keep it that way. However, running a site like CADTutor does cost money and you can help to improve the service and to guarantee its future by donating a small amount. We guess that you probably wouldn't miss $5.00 but it would make all the difference to us.
Note from Michael: I want to thank all of my customers for continuing to retain my training services (some for over three decades!) and let you know your donations do not go to me personally, but to the ongoing maintenance of the CADTutor ship as a whole and to support the yeoman efforts of my friend and CADTutor captain, David Watson, to whom I am grateful for this monthly opportunity to share a few AutoCAD insights.


