 Michael’s Corner #136
October/November 2014
Inside Some A2015 Updates

At this writing, I have just returned from training this amazing group of AutoCAD users in Manila! They were very receptive and gracious to all I had to share with them, and I loved every minute! Through the efforts of my longtime customer, One Workplace, I thoroughly enjoyed an unforgettable training session with ProView Studio. You guys rock!! WootWoot!
If you are a current user of AutoCAD 2015, you have probably encountered at least a couple of the topics I have here. If you're not there yet, there may be something in here that will get you excited about upgrading. As I have been training this version over the last couple months, here are a few things I kept track of that I wanted to pass along…
…The new Text Align command—very nice.
…Insights into the new Block ‘Ribbon Gallery’—expanding upon an existing theme
…Quick View Layouts on the File tabs—and where you can find Quick View Drawings
…The new Cursor Badges—Yes or No
Also, if you haven't gotten it yet, Service Pack 2 is available and was released in mid-September. The best part of this update is we, once again, have the ability to copy a layout tab, by clicking and dragging and holding down the Ctrl key to make a copy!!
 My Autodesk University Hands-on Lab, Click My Ride: Customizing AutoCAD for How You Work is being repeated!! I know there are many who were hoping this would happen (including ME!), so check the AU website—http://au.autodesk.com/—where you can sign up for class (AC8277-L) which is the repeat date of Wednesday, Dec 3rd at 2:45pm (it's a 75 minute lab). Please come up and say ‘Hello’… and sit on the front row! (I like to have my friends close when I do these big events).
Keep up the good work!
If you would like to contact me directly, you can do that also.
Blessings to one and all,
Michael
The A2015 Text Align Command
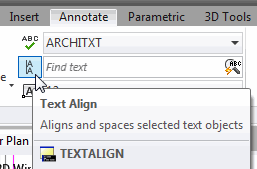 One of the productivity tools that you can download from my website is OBJNO2.LSP. It's a simple sequential numbering routine where you enter the first number, the text height, then start picking points… but you can't line the numbers up by turning on Ortho.
So, after numbering several items, let's look at the Text Align command, recently introduced in A2015.
Insights
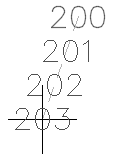 Alignment. The alignment option—available only when the command begins—enables you to specify the alignment of the selected text. These are identical to the justification options seen in Single Line and Multiline text. An alignment of MC is shown in the figure.
[Left/Center/Right/TL/TC/TR/ML/MC/MR/BL/BC/BR]
‘Text object to align to’ [Point]. The ‘baseline’ text object can either be part of the selection set, or remain unselected. You may also pick a non-text location for the alignment of the selected text.
Result Options. Once the text has been selected and you have established a position for the alignment, you can choose how that text is spread out or aligned.
Enter an option [Distribute/Set spacing/current Vertical/current Horizontal] <current Horizontal>:
The Distribute option is the most immediately gratifying (and shown in the MC example, above) and is similar to the result when you dynamically edit an associated array. The Set spacing option is pretty straightforward, but the ‘current’ options—Vertical and Horizontal—are initially counter-intuitive. The following exercise will help.
How to Align Existing Text Horizontally
Launch Text Align [TA], then select all the text to be aligned and press [Enter].
Select a ‘text object to align to’, or use the [Point] option. In the figure, I picked the point indicated by the arrow.
Click Options. To maintain the current horizontal spacing/position of the selected text, I used the option for current Horizontal.
Turn on Ortho, then pick the second point of the alignment line.

It takes a couple tries to get used to it, but I think it's a very welcome addition to the text collection.
Note: If you have downloaded my productivity .LSP files to a folder that is not on the default Support File Search Path, when you open AutoCAD, you may get a File Loading—Security Concern notice regarding ‘trusted locations’, see the July 2013 Odd Spot to configure your system to allow for loading of these routines.
Power Tool
The Block ‘Ribbon Gallery’
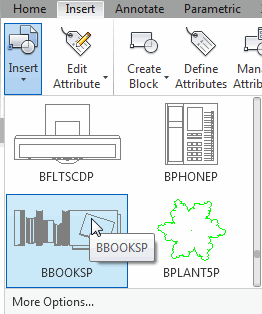 I saw this on one of Heidi Hewett's videos and wanted to pass it along if you haven't encountered it yet.
Many of my blocks I place from the tool palette, but when I'm in a drawing I'm not familiar with, this block gallery provides a nice graphic option for selecting blocks.
Insights
Accessed from the Block panel on either the Home or Insert tab, click the Insert button to display a graphic gallery of all the block definitions in the drawing. This means that there may be blocks that you can still Purge from the drawing, but until you do, they're still available in the gallery.
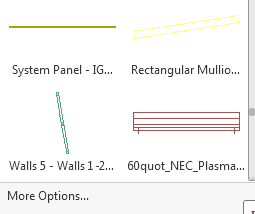 Good news. After placing or opening the gallery view, when you open it again, it remembers where you were.
Not so much. The block names are not arranged alphabetically, as seen in the 2nd figure.
More options. Opens the Insert dialog box… where the block names are alphabetical.
The Odd Spot
Drawing Tabs = Quick View Layout
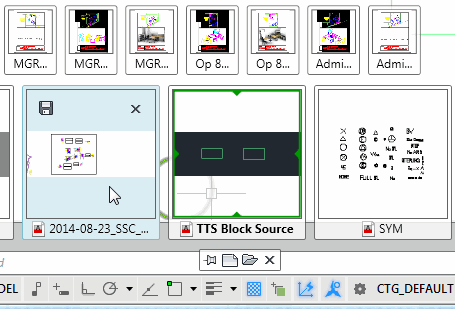
AutoCAD 2015 eliminated the Quick View Drawing and Quick View Layout items from the Status bar, but incorporated the Quick View Layout display into the File Tabs at the top of the screen. Hover on a file tab, and a thumbnail view of all the tabs on that drawing are displayed! Nice!

…but what about the Quick View Drawing feature??
Type QVD to display thumbnails of the open drawings along the bottom of the screen, then hover on any drawing thumbnail to view the layouts. For more on Quick View Drawings, take a look at Michael's Corner, January 2011.
The Basics
‘Sign Language’

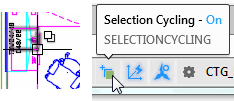 For the last few versions we have seen icons next to the cursor for Geometric Constraints (left) and Selection Cycling (right), as well as the little icon for a Locked layer and the Match Properties paintbrush.
Those icons are displayed when the related feature is enabled.
Cursor Badges
But AutoCAD 2015 now has included a ‘cursor badge’ for several editing commands, such as Rotate and Erase (see figures below), along with Measure and even the Window and Crossing selection direction badges.
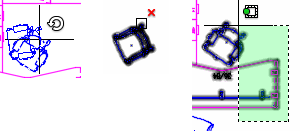
Some of you, however, may prefer not to see the new badges beside the cursor. If so, set the variable CURSORBADGE to <1>, which will disable all badges.
Left Field
What a Charming People: My first job out of college [B. Architecture, University of Cincinnati/DAA] was at Bechtel in San Francisco, circa 1978. Obviously, this corporate empire employed folks from far and wide, and I soon realized how delightful the people of the Philippines are… not to mention the fabulous food they provided when we had the potluck birthday lunches!!
Even now, as I train around the US, the Filipino Designers I encounter are always quick with a smile, joyful, and very sharp. As I write this, I am days away from traveling to Pasig City where I will be doing some AutoCAD training, and I have no doubt that the experience will be memorable and the training days ones that I will never forget. This will make the 11th country where I've done CAD training… now if I can just get one more to make an even dozen!

Donate to CADTutor
If you found this article useful, you might like to consider making a donation. All content on this site is provided free of charge and we hope to keep it that way. However, running a site like CADTutor does cost money and you can help to improve the service and to guarantee its future by donating a small amount. We guess that you probably wouldn't miss $5.00 but it would make all the difference to us.
Note from Michael: I want to thank all of my customers for continuing to retain my training services (some for over three decades!) and let you know your donations do not go to me personally, but to the ongoing maintenance of the CADTutor ship as a whole and to support the yeoman efforts of my friend and CADTutor captain, David Watson, to whom I am grateful for this monthly opportunity to share a few AutoCAD insights.
The Basics
- Dual Dimensions in a Dim…
- UCSICON Options
- "Best of" Basics: Irreg…
- Tool Palette Basics
- Original Dimension Value
- Possible Solutions to th…
- Avoid Using 'Standard' i…
- Shorten the Plot Scales…
- Update the Source File B…
- User Increment Angles fo…
- Drawing Information
- 'Sign Language'
- Rotate with the Copy Opt…
- Use the INSERT Osnap on…
- To or From the Current L…


