EXPRESS Train: NeoCon 2004 Special
This month's coverage of Express Tools is in recognition of the attendees of my "AutoCAD Toolbelt" presentation at the NeoCon World's Trade Fair 2004 in Chicago June 14-16. I mentioned a few of my favorite Express Tools at the end of the handout, so I thought this would be an appropriate venue for an overview on those particular features.
To review last month's column or to see a listing of topics since January, 2003, check out the Michael's Corner archive page.
If you would like to contact me directly, you can do that also.
Blessings to one and all,
Michael
EXPRESS: MoCoRo
I love this routine. How many times have you used Copy, selected the objects, and made the copy, then when you go to Rotate and use the Previous option: The ORIGINAL stuff you selected to copy highlights, not the COPY.
Move/Copy/Rotate to the rescue! (MOCORO is the name of the command if you were to type it in). You can select the button from the ET: Standard toolbar, or from
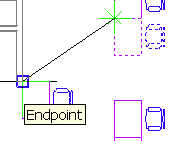 In the following exercise, I use the 8th floor furniture.dwg from the …\Sample folder of A2004 and A2005.
- Launch Move/Copy/Rotate, then select the objects and press <Enter>.
- Specify the Base Point, after which you will see the following option string:
[Move/Copy/Rotate/Scale/Base/Undo]<eXit>:
- Enter C for the Copy option, then specify a point for the copy. Since the routine will allow you to make more than one copy, press <Enter> to complete the copy procedure … and notice what highlights: The Copy! [Not the original!]
- Enter R for the Rotate option and then enter the desired value. Notice the selection set is still highlighted.
- Enter B and specify a different base point that may, for example, be more effective in the next procedure.
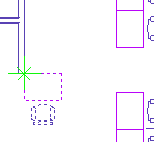
- Enter M for the Move option, then reposition the selected objects.
- Press <Enter> to end this command.
This is an extremely handy command when it comes to editing furniture placement. Although products such as CAP Designer (from 2020 Technologies, Inc.) or DesignExpress (from DataOne) have the Copy Rotate and Move Rotate features, this routine enables you to re-establish a base point and can easily go between the Move, Copy, and Rotate commands.
Power Tool
Draw: Break-line Symbol
 Located on the ET: Standard toolbar or from the menu, the Break-line Symbol makes the jaggie symbol as well as the line! Used in conjunction with a Wipeout, you can quickly communicate the specific area for the project within the base plan.
When you launch the Break-line routine, you will see the following information regarding the settings:
Block= BRKLINE.DWG, Size= 1/2", Extension= 1/4"
Specify first point for breakline or [Block/Size/Extension]:
Pertinent information regarding Break-line:
- All values should be multiplied by the current DIMSCALE setting. [That should explain why it hasn't "worked" before, shouldn't it?]
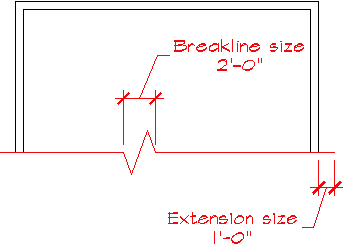
- The Extension is the distance beyond the points specified when creating the breakline that the line will "extend". If the Extension value is ¼" and the Dimscale value is 48, the resulting extension length is 12".
- The Size is the size of the breakline symbol itself. If the Size says ½" and the Dimscale value is 48, the resulting breakline symbol size is 24"
Instructions:
- Launch the Break-line Symbol routine.
- Pick two points to establish the line.
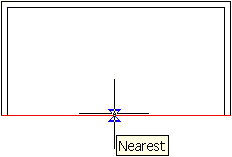
- The Nearest object snap is automatically invoked at the prompt to specify the location of the break symbol. Alternatively, you could press <Enter> to accept the default position of Midpoint.
The Odd Spot
System Variable Editor
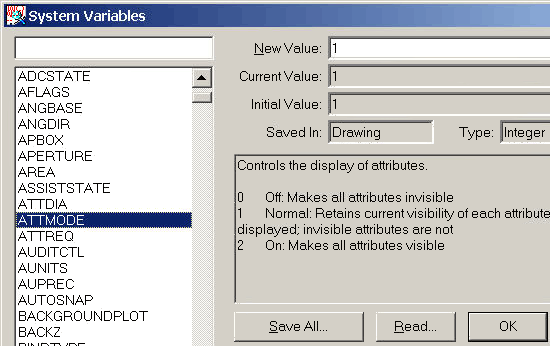
System Variable Editor. Another customer in the Los Angeles area brought this point to light recently. Without the System Variable Editor, "gathering" your system variables into a single, easily accessed file is an absolute pig. Hugh Bathurst and I preached the importance of script files when it comes to importing your "gottahave" variables (See Michael’s Corner, February, 2003), and we were ecstatic when we discovered the System Variable Editor, introduced in Volumes 1-9.
The System Variable Editor is the ultimate Cover-Your-Tail utility. Any given AutoCAD variable is either saved in the drawing or the registry. For example, the size of the cursor is set in the CURSORSIZE variable and is saved in the registry; it is the same across any drawing. On the other hand, the fillet radius, FILLETRAD, is a variable that can be different in each drawing. There are well over 400 system variables in AutoCAD 2005.
What To Do
After configuring AutoCAD with your desired settings, I would suggest you go to . Click the Save All button and save the SVF file as something like yourname.svf in some safe location.
When To Use It
Let's say somebody sends you a drawing and it is totally misbehaving and you can't figure out the problem. Go into the System Variable Editor and click the Read button, then navigate to yourname.svf and click Open. The SVF file reads in all the variables current at the time you created the SVF. Chances are, some of the conditions have now been "corrected" and you can continue with what you need to do.
The Basics
EXPRESS: Enclose Text with Object
This one is such fun. After adding text to a drawing such as room names, key numbers, etc. Use the routine called Enclose Text with Objects.
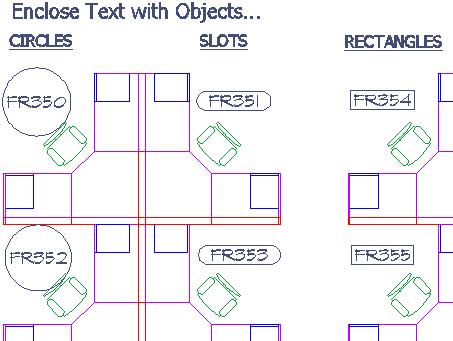
After selecting the text, you are prompted for the offset factor (Default = 0.35) which is a percentage of the text height by which the object is larger than the text at the nearest point.
Enter distance offset factor <0.3500>:
For example, the rectangle object is 35% larger than the text.
Enclose text with [Circles/Slots/Rectangles] <Slots>:
The first illustration shows examples of the three object types; Circles, Slots, or Rectangles.
Create rectangles of constant or variable size [Constant/Variable] <Variable>:

The final option regarding a Constant or Variable size takes into account the possibility that the selected Dtext or Mtext object(s) may be different in size as shown in the second illustration. If that's the case, press <Enter> for the default of Variable.
 Update from a Reader: Giving credit where due, I received an email from a reader (you know who you are) regarding my claim that Layuniso was A) overlooked and B) necessary. He very graciously contended that the Layer Previous button on the A2004/A2005 Layers toolbar functions very well as an alternative to the Layer Unisolate routine. Gold star.
Donate to CADTutor
If you found this article useful, you might like to consider making a donation. All content on this site is provided free of charge and we hope to keep it that way. However, running a site like CADTutor does cost money and you can help to improve the service and to guarantee its future by donating a small amount. We guess that you probably wouldn't miss $5.00 but it would make all the difference to us.
Note from Michael: I want to thank all of my customers for continuing to retain my training services (some for over three decades!) and let you know your donations do not go to me personally, but to the ongoing maintenance of the CADTutor ship as a whole and to support the yeoman efforts of my friend and CADTutor captain, David Watson, to whom I am grateful for this monthly opportunity to share a few AutoCAD insights.
The Basics
- Dual Dimensions in a Dim…
- UCSICON Options
- "Best of" Basics: Irreg…
- Tool Palette Basics
- Original Dimension Value
- Possible Solutions to th…
- Avoid Using 'Standard' i…
- Shorten the Plot Scales…
- Update the Source File B…
- User Increment Angles fo…
- Drawing Information
- 'Sign Language'
- Rotate with the Copy Opt…
- Use the INSERT Osnap on…
- To or From the Current L…


