

 Michael’s Corner #144
February/March 2016
In Five…
Yes, that's the countdown. Since 2003 it's been a treat to bring you monthly — and more recently, bi-monthly — insights to this endlessly exciting (and sometimes frustrating) wickedly-powerful software.
That said, it's time to direct my efforts elsewhere, so this will be my last year and there will be four more issues after this one. I'm leaning toward a ‘Final Edition’ of The AutoCAD Workbench, but I have yet to decide if and when that may be available.
In the meantime, here are a few things I thought would amuse, educate, and entertain…
…Introduced in A2016, the DIM command can be quite the time-saver.
…When making extensive edits, this Move Previous LISP routine may come in handy.
…Now that you're used to the ‘new’ File tabs at the top, here's how you can suppress that perpetual Start tab.
…Another quick tip on copying items on your Tool Palette.
Now, repeat after me: “We're just another day closer to Spring!!”
If you would like to contact me directly, you can do that also.
Blessings to one and all,
Michael
The DIM command
 Although I prefer to run my dimensions from the Tool Palette where the Layer and Dimension Style are preconfigured, nothing says you can't add this new command — DIM — to the palette and customize the General settings.
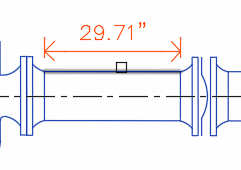
Key Feature: Rollover recognition of the object to be dimensioned. You launch the command, hover on the object and the dimension shows up. Pretty slick.
Legacy-User Note: [Wasn't quite sure what to call us ‘old-timers’]
Once upon a time there was a DIM: command line (and this is one of the reasons virtually all the macros you see have double ^C^C). I would use that occasionally to DIM/UP and select a dimension to update to the current Dimstyle. Curiously, -DIM doesn't call it up, so if any of you come across that, please let me know. Yes, there are other ways to update an existing dimension, but I was just checking under the hood.
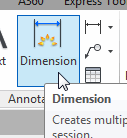
How to Use the A2016 Dimension [DIM] Command
 Set the desired Layer and Dimension Style, then click Dimension.
 Select objects or specify first extension line origin or Angular/Baseline/Continue/Ordinate/aliGn/Distribute/Layer/Undo]:Hover on an object, and if the length/size of the object is large enough, you will see a dimension. If not, you may use an object snap to specify the points.
The dimension preview is a muted color of the current layer, then when you move it away from the object — and if your Dimension Properties are setup accordingly — you see the full color of the layer prior to placement.
Insights
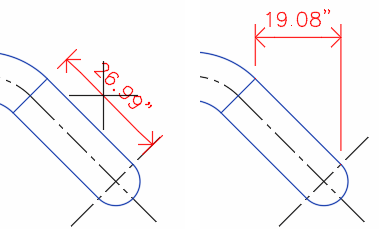
The side you ‘approach’ the object from will be the default side of the dimension line.
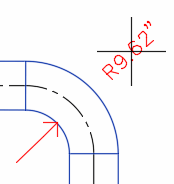
For non-orthogonal objects, an Aligned dimension is the default, so hold down Shift for a Linear dimension.
Power Tool
LISP for Move Previous
It's been a while — four years ago, actually; MC February 2012 — since I tinkered with a one-line lisp. I usually put my customization on a tool palette or the Quick Access Toolbar, but I had a request recently to automate the Move command with the Previous option.
MOCORO: This is an opportunity, however, to remind folks of the buried treasure of the MOCORO [Move/Copy/Rotate] command under Express Tools (see Michael's Corner June 2004), just in case you didn't know that one was out there.
When you create a Lisp routine, you always want to confirm that there's no other command that you may unwittingly supersede in the execution of your new routine. To keep this one simple and quick, I'm going to use MM as the hotkey combination to launch the Move command with the Previous option.
How to Write and Save a One-Line Lisp
Open Windows Notepad (not Word, it puts hidden characters in the header and footer).
First, it's always a good idea to identify what your routine is doing by adding a comment line at the beginning. Comment lines have a semi-colon as the first character on the line. Add something similar to the following as the first two lines in your notepad file.
;   CADTUTOR 3/2016
;   MOVE command with the Previous option
Add the following text as the next line. It's not case-sensitive and there is no preceding semi-colon:
(DEFUN C:MM()(COMMAND "MOVE" "P" "")(PRINC))Here's how all that stuff breaks down:
( AutoCAD takes off if you hit the spacebar, so the first open parenthesis puts AutoCAD on ‘hold’. DEFUN DEfine FUNction. You're telling the Lisp routine what you're setting up. C: The Command:line. The text that comes after C: is what you type to ‘run’ the Lisp.()( The ‘clutch’. Push it in ( change the gear ) let it out ( No options. Don't need to know. COMMAND For all one line Lisps, you need to let AutoCAD know you are using Commands. "MOVE" All commands and options go in quotes. Yes, you can put a space between them. "P" The option for Previous. "" Double-quotes; Lisp-speak for ‘Press Enter’. [Note: If you would like your routine to allow for the additional selection of objects after selecting the Previous selection set, leave out these double-quotes.] (PRINC) Locking the door on the way out. Suppresses that ‘nil’ you see in some routines. ) Resolve all the open parentheses. When you're finished adding your one-liners (you can have as many as you want, I would recommend comment lines between them, though), click File
 Save, then navigate to AutoCAD's ..\Support folder.
Important: You must enter the file extension of .LSP after the filename, not Notepad's .TXT. I'll name this one CT316_MPREVIOUS.LSP.
As I mentioned, your .LSP file can contain as many one-liners as you want. I simply recommend you put comment lines in between each routine so it doesn't look so cryptic when you review it later.
How to Quickly Run a One-Line Lisp
Launch AutoCAD, then open ‘My Computer’ (Windows Explorer) with Windows key + E.
Navigate to where you saved your .LSP, then drag and drop it into the AutoCAD drawing window.

You will see something like the following response on the command line:
Command: (LOAD "C:/Program Files/Autodesk/AutoCAD 2016/ Support/CT316_MPREVIOUS.LSP") C:MMIn the drawing, Move or Rotate a few things.
To run your routine, enter MM and you will be prompted to “Specify base point”! That's all there is to it!
Launching Your LSP from the Startup Suite
 If you have a .LSP file containing routines that you want to have available whenever you open AutoCAD, add that file to the Startup Suite. On the Manage tab
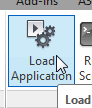
![]() Applications panel you will find Load Application. In the Load/Unload Application dialog box, you will find the golden key: The Startup Suite.
Applications panel you will find Load Application. In the Load/Unload Application dialog box, you will find the golden key: The Startup Suite.
How to Add Your .LSP to the Startup Suite
Click Load Application [Manage tab
Applications panel].-
 Click the Startup Suite suitcase at the bottom (or Contents) to open the Startup Suite dialog box.
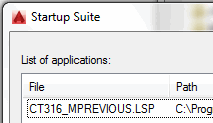
At the bottom of the Startup Suite dialog box, click Add, then navigate to the .LSP files in the ..\Support folder (or wherever you saved that file).
Select your .LSP file(s), then click Open to return to the Startup Suite dialog where you will see the file(s) listed.
Click Close, then Close out of the Load Application dialog box.
To make them work, you will need to close and re-launch AutoCAD.
Those are just, plain fun. Like a good book or a new favorite restaurant or whatever brings a smile to your day.
The Odd Spot
Start Tab
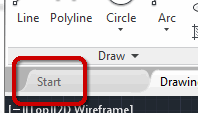 Beginning in AutoCAD 2016, the Start tab is perpetual; it just hovers there at the left end of the File tabs. Not that there's anything wrong with that, but if you would rather the File tabs only include what you're working on, set the STARTMODE to <0>. Ahhhh, better.
The Basics
Tool Palette Basics
I learned something new about tool palettes last year — thanks to Nate at Wellcare in Tampa — and I wanted to pass it along. It's a trick that I should have thought of and can be used in a number of situations in AutoCAD. Specifically, the Ctrl key!
Short version: Rather than doing a right-click Copy / right-click Paste — which always put the copy at the bottom of the tab — simply hold down Ctrl, then drag & drop.
How to Copy Tools Onto and Between Tabs on a Tool Palette
Open the Tool Palette (Ctrl + 3). [For future reference, if you're new to palettes, I have a sample palette on my website, complete with a block source drawing and instructions.]
-
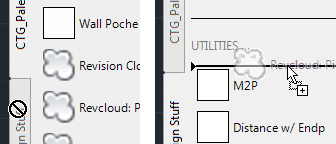
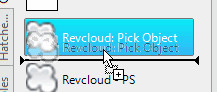 To copy a tool below itself, hold down Ctrl, select the tool, then drag it down a smidge and release. You should see a very small plus-sign at your cursor indicating that you are making a copy.
 To copy a tool between tabs, hold down Ctrl, then drag your cursor onto another tab and hold it there. You will initially see a No-Can-Do sign, but then it will flip over to that tab.
Drag your tool to the desired location — you will see the same plus-sign at your cursor — then release!
Left Field
Fort Bragg Glass Beach: Any coastline along the ocean or major body of water is breathtaking, but there's a short stretch of beach along California's northern coast in the Fort Bragg area that has a unique attraction — Glass Beach.
Not that you'd need much of a reason to visit the quaint village of Fort Bragg — a personal nostalgic favorite — but the next time you happen to be wandering that direction, have a look!

http://www.fortbragg.com/explore/glass-beach/
Donate to CADTutor
If you found this article useful, you might like to consider making a donation. All content on this site is provided free of charge and we hope to keep it that way. However, running a site like CADTutor does cost money and you can help to improve the service and to guarantee its future by donating a small amount. We guess that you probably wouldn't miss $5.00 but it would make all the difference to us.
Note from Michael: I want to thank all of my customers for continuing to retain my training services (some for over three decades!) and let you know your donations do not go to me personally, but to the ongoing maintenance of the CADTutor ship as a whole and to support the yeoman efforts of my friend and CADTutor captain, David Watson, to whom I am grateful for this monthly opportunity to share a few AutoCAD insights.
Share this page:


The Basics
- Dual Dimensions in a Dim…
- UCSICON Options
- "Best of" Basics: Irreg…
- Tool Palette Basics
- Original Dimension Value
- Possible Solutions to th…
- Avoid Using 'Standard' i…
- Shorten the Plot Scales…
- Update the Source File B…
- User Increment Angles fo…
- Drawing Information
- 'Sign Language'
- Rotate with the Copy Opt…
- Use the INSERT Osnap on…
- To or From the Current L…


