

 Michael’s Corner #108
December 2011
Fun Winter Memories
Hopefully this finds you all looking forward to a fun Christmas season! Be it on the beach sunning and swimming or on the mountain trails skiing and schussing, winter activities are always fun. I think my favorite snow-related memory is here at home in Kentucky, after a pretty good snowfall, sledding down our steps, down the front yard, across the road, down the hill, then rolling off before getting to the creek at the bottom. The walk back, however…
On the AutoCAD front, perhaps you will find something in this month's offerings (presents?) that you will remember and use to make you a wee bit more productive, get the job done sooner, and get to spend more time at home! Consider the following…
…How to use the Revolve command to create a Surface Model
…Features of the Navigation Bar that you may actually be able to implement
…A more efficient way of toggling on and off Isolated objects
…Docking your windows to be more productive, especially when checking your drawing
My schedule at the end of December will be not unlike Santa as he jets around the planet; Guam one week and New York City the next. Nonetheless, I'm sure it will be a wonderful - and memorable - adventure. My lovely bride of 25 years keeps telling me to "Enjoy the Moment". Good advice to one and all.
Blessings to you all for a delightful Christmas season and a great New Year!
If you would like to contact me directly, you can do that also.
Blessings to one and all,
Michael
A Quick Pique at Surface Modeling
 The 3D Modeling side of AutoCAD is immense; the iceberg IS the tip. The limitation of 24 hours in a day has kept me from getting any deeper than the shore of this exciting area of AutoCAD, but I wanted to just give you a peek at the less-used concept of Surface Modeling. The 3D darling of the program is Solid Modeling, but Surface Modeling has its place.
 Before beginning this endeavor, save your current Workspace because we are going to use the 3D Modeling workspace in the following exercise. If you're unfamiliar with how to save your workspace, see Michael's Corner, May 2009.
This exercise will introduce you to the surface modeling feature called Revolve, and hopefully pique your interest to investigate it more fully. I started with this command - called 'Revsurf' then - when the Advanced Modeling Extensions (AME) came out in Release 10, I think.
How to Create a Revolved Surface
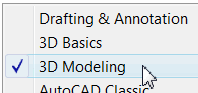
 After saving your current workspace, click Workspace Switching, then 3D Modeling.
On the View tab
 Views panel, set your view to SE Isometric.
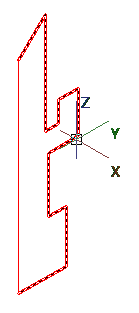
Use the Line command and draw a 10″ line in the Z-Axis.
Type 3DPOLY and create any path from the bottom of the line to the top of the line.
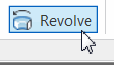 On the Surface tabCreate panel, click Revolve.
When prompted to select the objects to revolve, enter MO for the Mode option, then enter SU for Surfaces option.
Now, select the 3Dpolyline as the object to revolve, then press Enter.
When prompted to specify the axis, press Enter for the <Object> option, then select the 10″ line.
Turn off Ortho, then move your cursor around to see the revolving of the shape. At this point, you could either specify a point to complete the revolution, or enter an angle.
To see your model more clearly, on the View tab, set the Visual Style to Shades of Grey or Conceptual.
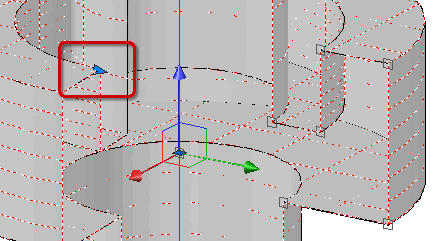
Note: If you want to increase or decrease the angle of revolution, click on the model, then click the arrow grip, then move your cursor to edit the revolution.
Power Tool
That Navigation Bar
![]() I will admit that I find that Navigation Bar to be, OK, annoying. But I say that because I can Pan and Zoom Extents and kick in 3D Orbit using my old-timey, wired Microsoft optical mouse. But these days, there's a mouse for every flavor of ice cream, and they don't all have equal abilities and settings. That said, here are some insights into this interesting collection of 'Navbar' settings and navigation tools.
I will admit that I find that Navigation Bar to be, OK, annoying. But I say that because I can Pan and Zoom Extents and kick in 3D Orbit using my old-timey, wired Microsoft optical mouse. But these days, there's a mouse for every flavor of ice cream, and they don't all have equal abilities and settings. That said, here are some insights into this interesting collection of 'Navbar' settings and navigation tools.
Navigation Bar Visibility
The visibility setting is saved in the registry; i.e. permanent. Whether you use the NAVBAR command and turn it OFF, the NAVBARDISPLAY variable and set it to <0>, or click the teeny, tiny X in the upper right corner, it will stay off until you use the command or the variable to bring it back.
Navigation Bar Menu
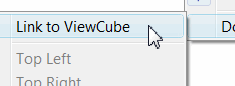 In the bottom right corner is a teeny, tiny arrow that displays a shortcut menu. If you turn off the Link to ViewCube setting, you will be able to dock the Navigation Bar elsewhere on your screen.
Navigation Bar Position
 If you keep the Link to ViewCube setting, you can choose one of four screen positions. When you disable the Link to ViewCube setting, you can position the Navbar anywhere along the perimeter of the screen by dragging the teeny, tiny bar positioned at the top of the feature.
Navigation Bar Tools
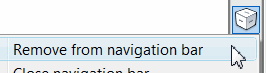 Each tool can be removed from the Navbar by right-clicking on that tool. I'm not sure why, after turning off the visibility of the ViewCube [Options
![]() 3D Display tab], that the ViewCube tool is still displayed on the Navbar, but I've opted to remove it.
3D Display tab], that the ViewCube tool is still displayed on the Navbar, but I've opted to remove it.
Navigation Wheel
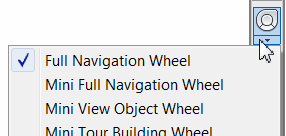 In a future column, I'm going to cover this powerful little tool that has multiple options and see what it has to offer.
Pan tool and Zoom tool (with a menu)
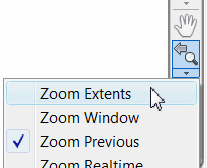 If you can't Pan and Zoom with your wheel mouse, these two tools are the way to go. I see lots of folks with a variety of Logitech mice, and these tools save the day.
3D Orbit (with a menu)
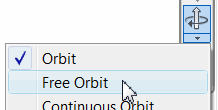 Some folks can push down their wheel like a button, hold down Shift, and launch 3D Orbit. If that's not something you can do, this is your go-to feature.
Show Motion
![]() This last one on the Navbar sounds great…
This last one on the Navbar sounds great…
but that will have to wait for another day.
The Odd Spot
‘Isolate Objects’ Status Bar Icon
 "Can't see the forest for the trees". That's the only explanation I have for my oversight, and leave it to a customer to (graciously) bring it to my attention (thanks, Aga!)
Back in May 2010, I covered the really cool new features in AutoCAD 2011 of Isolate Objects and Hide Objects, and to this day, I incorporate these features in my training courses. I even addressed them in my Autodesk University 2011 Lab! "Live and Learn" is another one that comes to mind here.
Insights and Applications
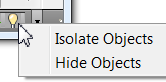
 The Isolate Objects button is tucked way down in the bottom right corner of the Status bar.
It's always there and doesn't even have a presence on the menu when you right-click on the Status bar!
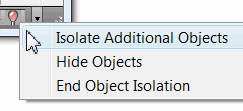
After Hiding or Isolating objects, the icon turns Red. Click the icon for a menu of options regarding hidden or isolated objects.
The Basics
Optimized Viewing of Your Drawing Info
I saw this setup on customer's computers twice in the last month, and thought I'd take a look at how to set my system up like this… and it's pretty cool!
In the larger figure, the Layer Properties Manager and the Properties palette are docked; one above the other. Here's how they did it.
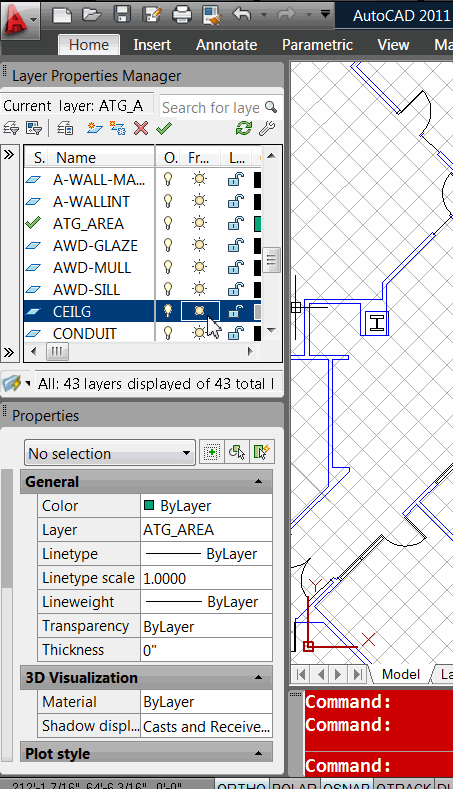
How to Dock Multiple Windows
Open the Layer Properties Manager and the Properties palette. You can do this with any palette, including your Tool Palettes.
 Right-click on the title bar of the palettes you are using, and make sure Allow Docking is checked.
Dock one of the windows to either the left or right side.
Drag the second window into the lower half of the docked window until the boundary changes to a rectangle that's smaller than the docked window, then release your cursor.
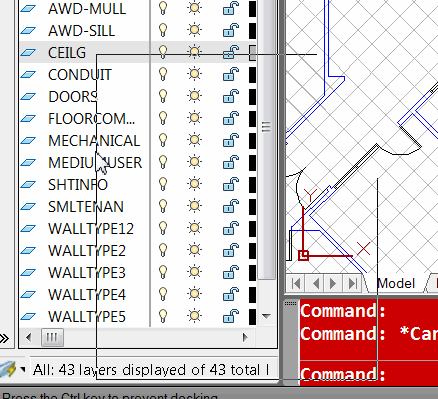
Note: When you turn off docked palettes, they will return to their docked position when you turn them back on!
Left Field
Have you Heard? : "…and all who heard it wondered at the things which were told them by the shepherds. But Mary treasured all these things, pondering them in her heart. 20 The shepherds went back, glorifying and praising God for all that they had heard and seen, just as had been told them." - Luke 2:18-20
Donate to CADTutor
If you found this article useful, you might like to consider making a donation. All content on this site is provided free of charge and we hope to keep it that way. However, running a site like CADTutor does cost money and you can help to improve the service and to guarantee its future by donating a small amount. We guess that you probably wouldn't miss $5.00 but it would make all the difference to us.
Note from Michael: I want to thank all of my customers for continuing to retain my training services (some for over three decades!) and let you know your donations do not go to me personally, but to the ongoing maintenance of the CADTutor ship as a whole and to support the yeoman efforts of my friend and CADTutor captain, David Watson, to whom I am grateful for this monthly opportunity to share a few AutoCAD insights.
Share this page:


The Basics
- Dual Dimensions in a Dim…
- UCSICON Options
- "Best of" Basics: Irreg…
- Tool Palette Basics
- Original Dimension Value
- Possible Solutions to th…
- Avoid Using 'Standard' i…
- Shorten the Plot Scales…
- Update the Source File B…
- User Increment Angles fo…
- Drawing Information
- 'Sign Language'
- Rotate with the Copy Opt…
- Use the INSERT Osnap on…
- To or From the Current L…


